
Steps to Configure Die Cut Sticker Printing
1. Open Impact Designer Admin.
2. Click “Products” on the navigation panel.

3. The products listing page will appear. Click “Settings”, which is below the Actions panel.

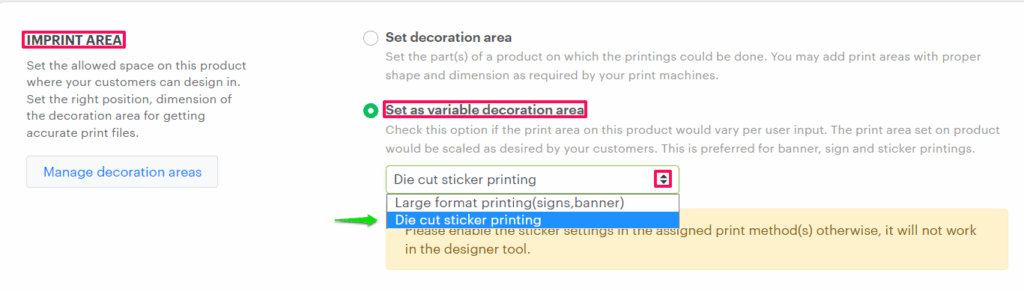
4. Scroll down to the Imprint Area section. Enable the radio button of Set as a variable decoration area. Click the dropdown and select the Diecut Sticker Printing option.
5. Under Allow User To Change Dimensions, set the default width and height of the sticker.
6. Select the checkbox for Enable Custom Product Size. Enter the dimensions for minimum width and maximum width, and also minimum height and maximum height. You can also set the bleed mark values for your sticker product.

► The sticker product will load the designer tool with the default dimension. Enabling custom product sizes will allow your customers to change the dimensions of the sticker within the range set for width and height.
7. Scroll down and click the “Save decoration area.”
You have successfully configured die cut sticker product!