
Steps to Configure Production Email Templates
1. Open Impact Designer Admin.
2. Select ”Production hub” on the navigation panel.

3. Move to the right. Click on the Production hub settings drop-down and select “Production settings.”

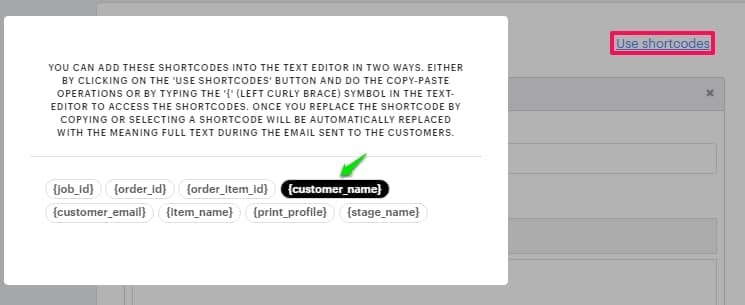
4. Scroll down to the Email Templates section. Click on the Use shortcodes label. Here we have provided a few shortcodes that you may need in the email template message. You can use these shortcodes by clicking on them and then pasting them into the message box. While sending emails to customers, the shortcodes will be automatically replaced by the original text.
5. Click on an email template. You can add the shortcodes as per your requirement. If you want to send an email for a particular status, then you need to click on the checkbox for that email template.

6. Here we have provided two fields for each template i.e., subject and message.
- SUBJECT – The subject field is a brief description of the message. Here you can change or update the email template subject that will be sent to the customer.
- MESSAGE – Here you can add any text message that you want to send to your customer.

7. Scroll down to click “Save.”
You have successfully configured production email templates!