
To enable a variable decoration area:
1. Open Impact Designer Admin.
2. Click “Products” in the navigation panel.

3. On the Products page, click “Settings” under the Actions column.

4. Scroll down to find the Imprint Area section.
• Enable the radio button labeled Set as a Variable Decoration Area.
• From the dropdown, select “Large Format Printing”.

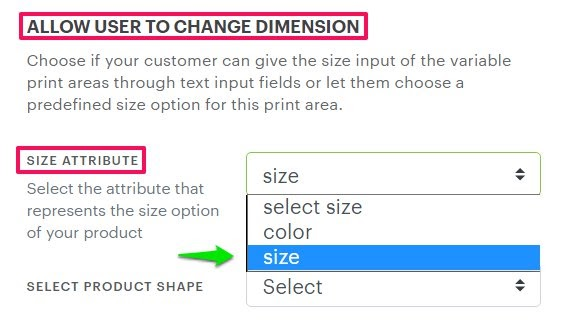
► Configuring a size attribute allows customers to select a predefined size that’s already assigned to the product in your e-commerce store.
5. Under Allow User to Change Dimensions, open the dropdown for Size Attribute and select the size attribute for the product.
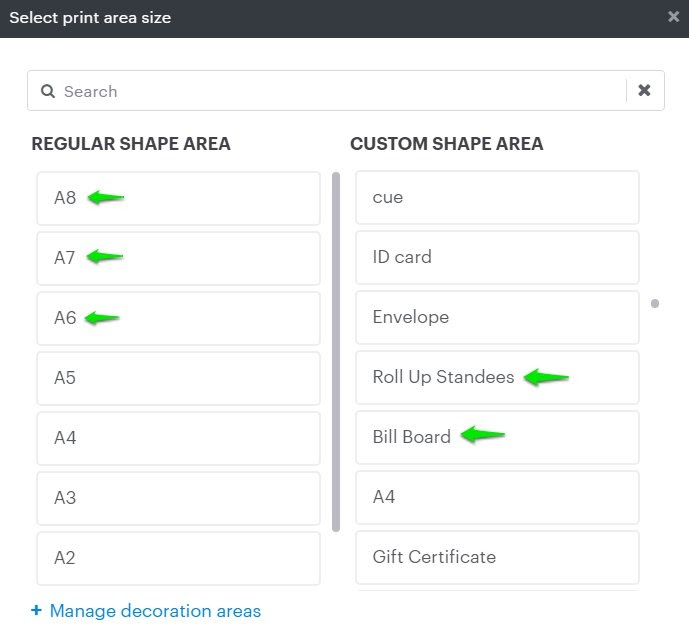
6. Open the dropdown for Select Product Shape.
• A pop-up will appear, choose your desired decoration area shape for the product.
7. Move to the right to adjust the decoration area as needed.
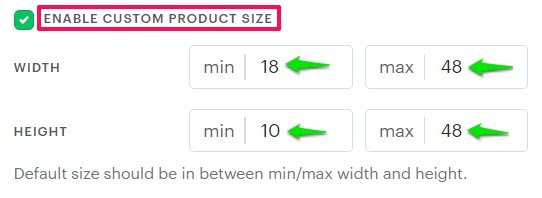
► Enabling Custom Product Size allows customers to adjust product dimensions within a defined minimum and maximum range.
8. Check the box labeled “Enable Custom Product Size”.
9. Enter the values for minimum width, maximum width, minimum height, and maximum height.
10. Scroll down and click “Save Decoration Area”.
You’ve successfully enabled a variable decoration area for your product!