
To draw your own boundary for a product:
1. Log in to Impact Designer Admin.
2. From the left navigation panel, click “Products”.

3. On the Products page, click “Settings” under the Actions column.
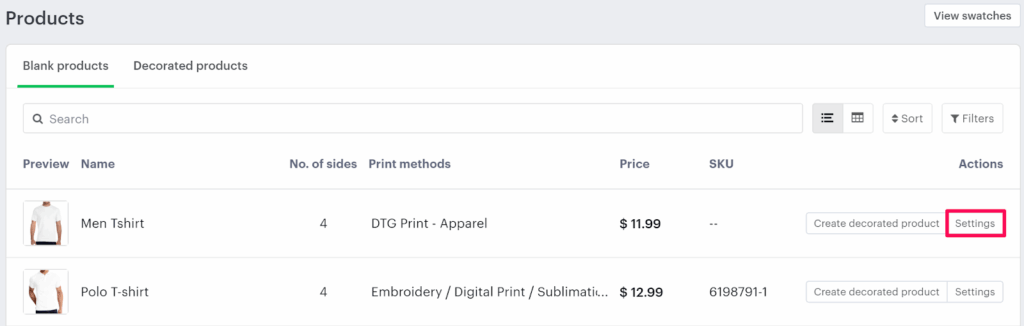
4. The Decoration Area Settings page will open.
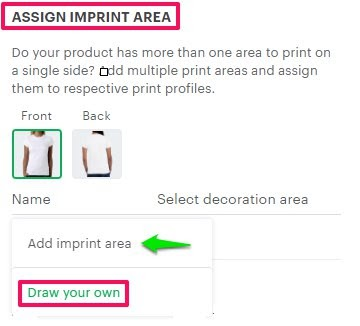
• Scroll down to Assign Imprint Area.
• Hover over Add Imprint Area and click “Draw Your Own”.
5. A set of drawing tools will appear, allowing you to define your own boundary on the product.
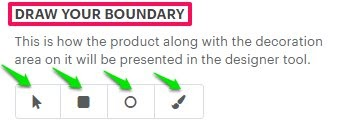
Tool Descriptions
- Select Tool – Used to select the boundary over the product
- Square/Rectangular Tool – Used to draw a rectangle or square boundary on the product.
- Ellipse/Circle Tool – Used to draw an ellipse/circle boundary over the product.
- Path Tool – Used to draw the boundary over the product on your own.
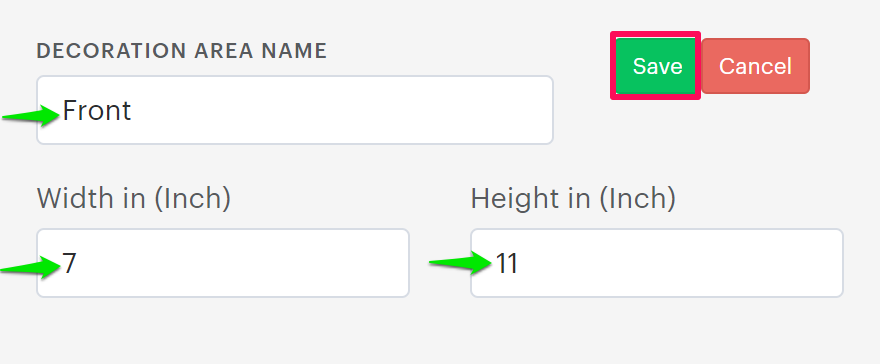
6. Once you finish drawing the boundary, a pop-up will appear.
• Enter the decoration area name, width, and height.
• Repeat the same steps to draw boundaries on other sides of the product if needed.
7. Click “Save” to apply your changes.
You’ve successfully drawn a custom boundary for your product!
► After creating your boundary, make sure to assign an imprint method, then assign it to each side of the product.