
An SVG-based configurator allows customers to personalize products by changing the colors of different parts or sections. It also enables them to enhance the product with patterns and gradients applied to specific sections.
Steps to Create an SVG-Based Configurator
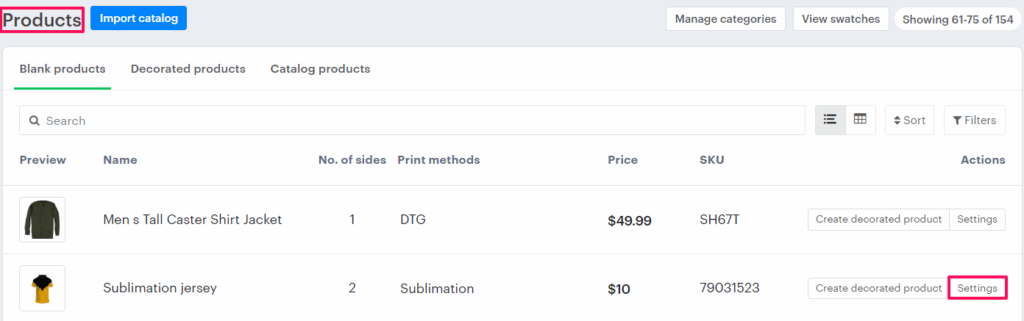
1. Open Impact Designer Admin and click “Products” from the navigation panel.

2. The product listing page will appear. Click “Settings”, located below the Actions panel.
► Before accessing the configurator tab, ensure that both the print method and decoration area are assigned to the product. These settings are required to enable the configurator feature. Once configured, you can proceed to the configurator tab to complete the setup. (Click here to learn how to configure these settings.)
3. Move to the right and click the “Configurator” tab.

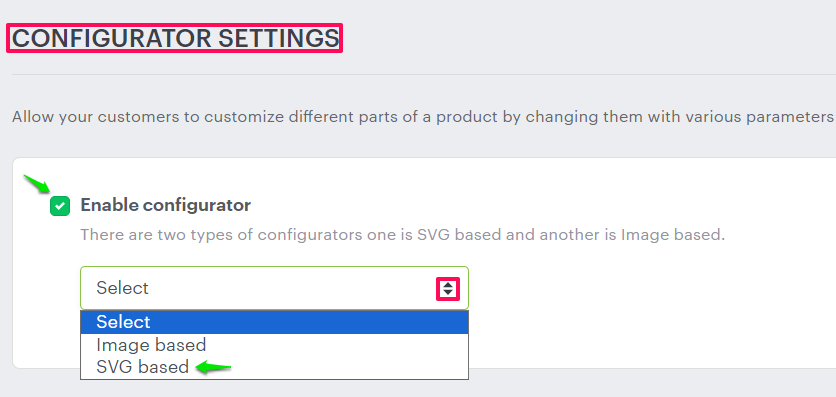
4. The Configurator Settings page will open. Select the checkbox “Enable Configurator”, then open the dropdown and choose SVG-based.
5. In the text box, enter the side name. Click “Upload SVG” and upload the SVG file where each configurable part of the product is defined as a separate path. Impact Designer will automatically detect the individual parts, allowing you to assign colors to each section.
6. In the Name column, set the name for each section. Enter the section name and select a color category from the dropdown. In the Color Category column, click the dropdown to select a color category. The categories added in Printable Colors will appear here.
7. In the Pattern Category column, click the dropdown to select a pattern category. The categories added in the Configurator Pattern will appear here. Select the desired pattern category.
8. Finally, enable the checkboxes in the Color, Pattern, and Gradient columns for the options you want to display for each section of the product.
► A gradient in the configurator creates a color transition effect where one color blends smoothly into another, adding depth and visual appeal to the product.
► The supported file format for configurable products is SVG. Create the SVG file using Illustrator. While creating it, ensure that it includes groups, and within each group, there are multiple paths with fill colors. The paths represent the number of sections or different parts of a particular side of the product, and the fill colors indicate the colors that can be changed.
9. Click “Upload Shadow Image” to upload the shadow image for that particular side of the product in PNG or SVG format.
► A shadow image in the configurator adds a realistic lighting or shadow effect behind the product, making the design appear more lifelike and three-dimensional.
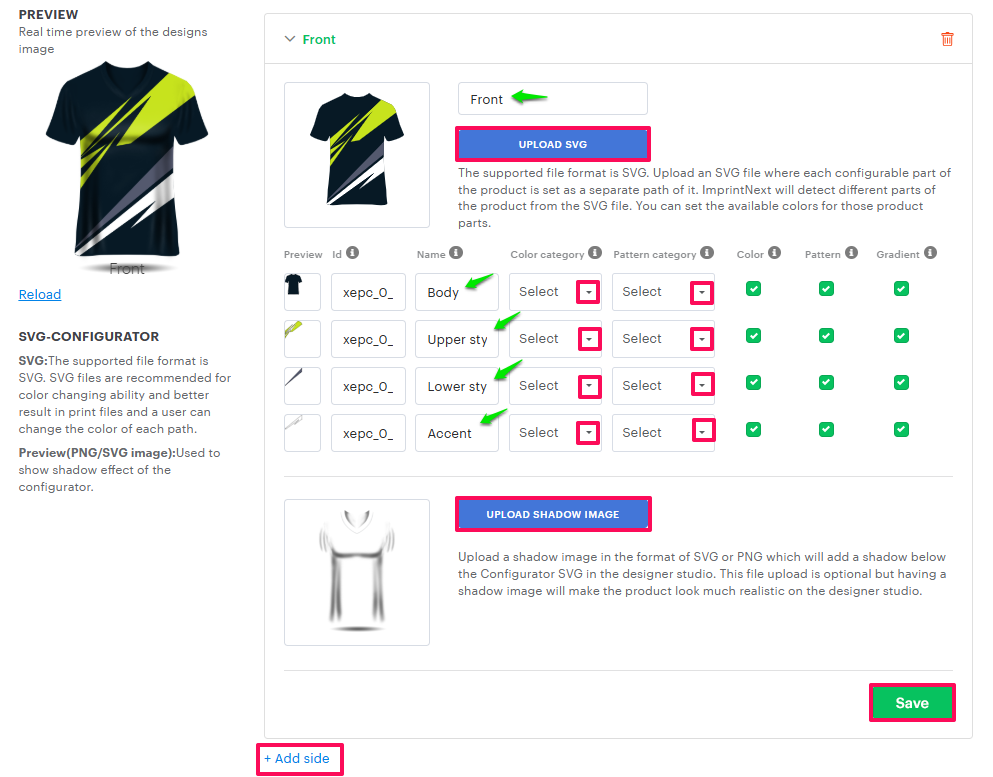
10. To add another side of the product, click “Add Side”. Enter the side name, upload the corresponding SVG and shadow image, and click “Save” to confirm.
11. Scroll down and click “Save” again to finalize your configuration.
You have successfully created an SVG-based configurator!