
Steps to Enable ImageMagick for Image Processing
1. Open Impact Designer Admin.
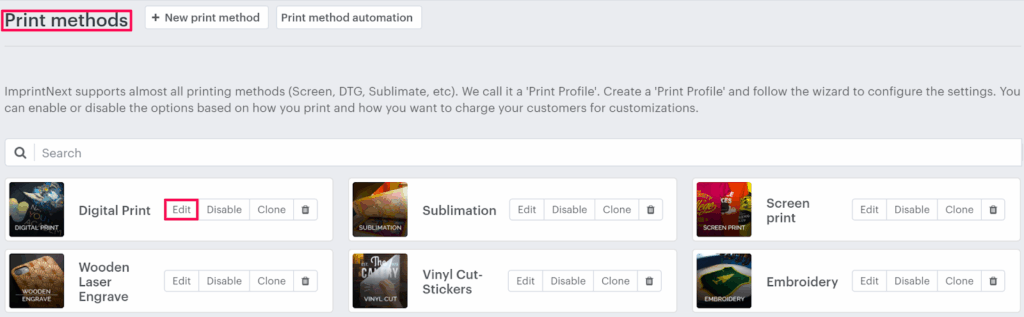
2. Click “Print Profile” in the navigation panel.

3. In the Print methods page, select your print method and click “Edit”.
4. The print method setting page will appear. Scroll down to find the Image setting. Under Image Processing, enable the radio button of Use Imagemagick for image processing.
5. Under the Upload image formats, select your desired format for uploading the image
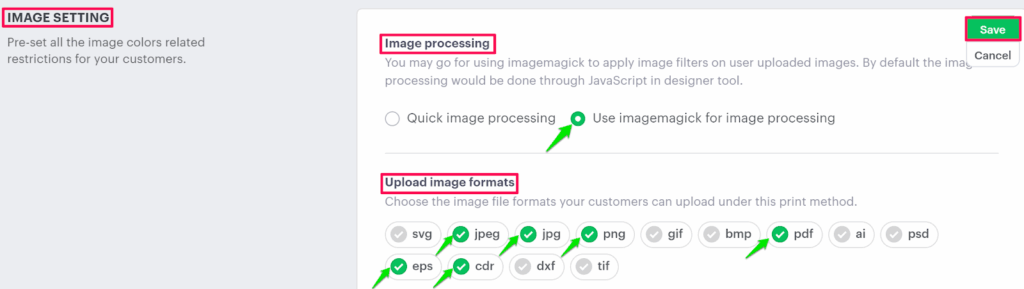
6. Click “Save” or scroll down to the bottom and click “Save”.
► To display the format of the image, you need to install the extension below on your server:
- ImageMagick version 6.8+ with the following built-in delegates bzlib djvu fftw fontconfig freetype jbig jng jpeg lcms lqr lzma openexr pangocairo png tiff wmf x xml zlib
- Inkscape 0.92.5 (0.92.5+68)
- GhostScript 9.26
You have successfully enabled ImageMagick for image processing!