
Steps to Enable Team Jersey
1. Open Impact Designer Admin.
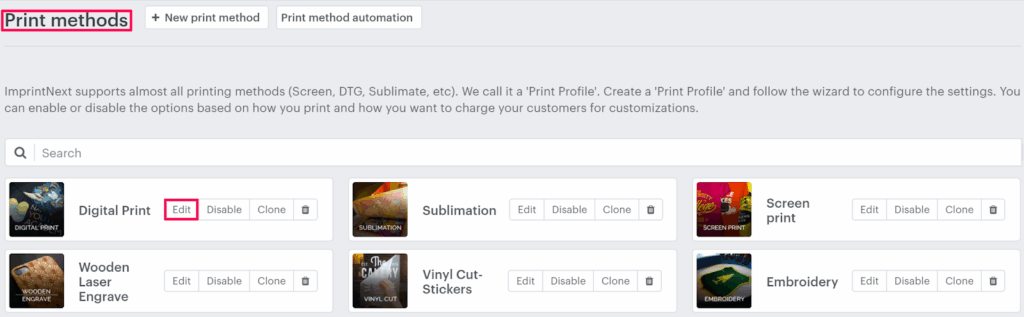
2. Click “Print Profile” in the navigation panel.

3. In the Print methods page, select your print method and click “Edit”
4. The Print method setting page will appear. In the Feature on/off, enable the checkbox of Team Jersey.

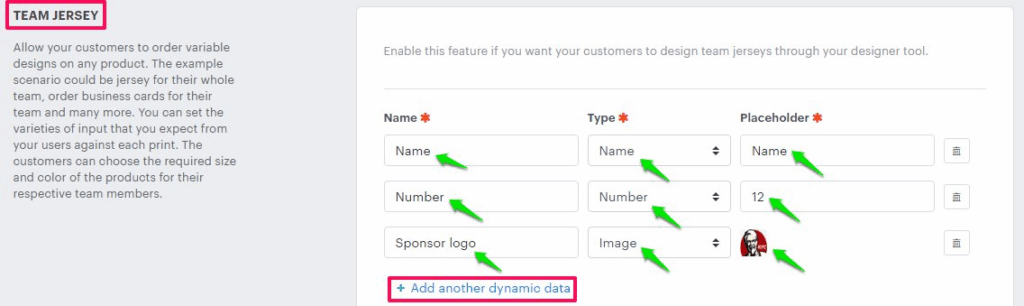
5. In the Team Jersey section, configure the Name, Type, and Placeholder.
- Name – Here you can mention the name of the label that will show for the Name or Number, or Image.
- Type – In this section, you can set whether the Name or Number, or Image will be used by the customer.
- Placeholder – Give the name to the placeholder, which will be shown when it is used for customizing the product.
► You can add more options for the Team Jersey by clicking “Add another dynamic data”.
► For Name and Number, at the time of checkout, you can allow your customer to select a different color, size, and quantity for each member of the team.
Allow separate product colors for the different players
– Enable this option to allow the customer to select a different color for each member of the team
Allow to change size variant
– You can give an option to select a different size of the jersey for the team member
Allow to change quantity
– Enabling this option will allow your customer to enter the quantity for each player present in the team.
Generate single print file with dynamic data in a CSV files
– To get all the information of the team member, like name, number, color, etc,. in a single CSV file, you can enable this option.
6. Click “Save”
You have successfully enabled the Team Jersey feature!