
Steps to Add a Product in PrestaShop Admin
1. Log in to PrestaShop Admin.
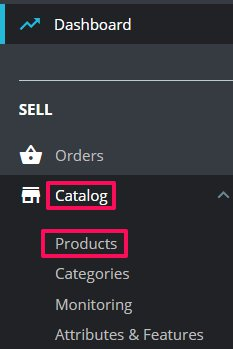
2. From the left panel, click “Catalog” and select “Products”
3. The Products page appears. Click “New Product” located in the top-right corner.

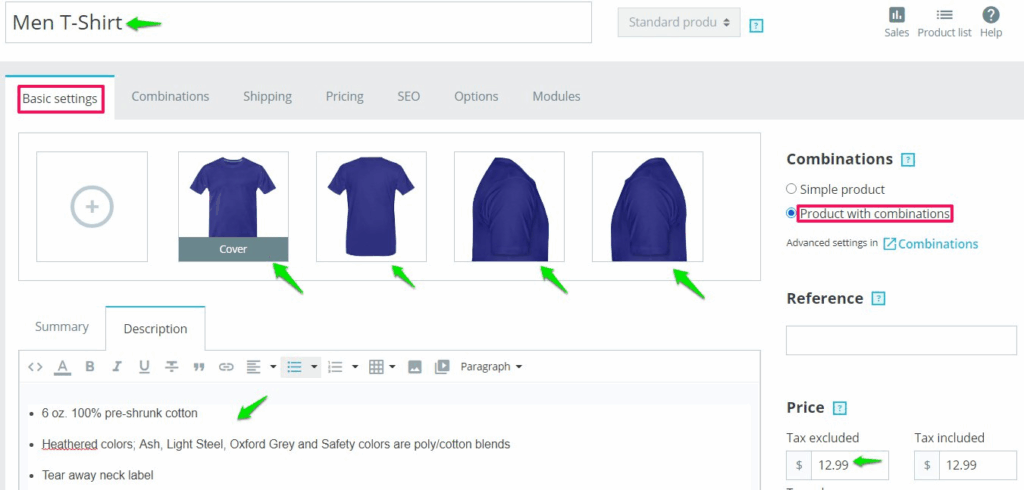
4. Enter the product name. From Basic Settings, upload the product image.
► Upload product images with different color variants and multiple sides.
5. Under Description, enter the product description.
6. Move to the right and select the checkbox Product with combinations.
7. Under Price, set the product price.
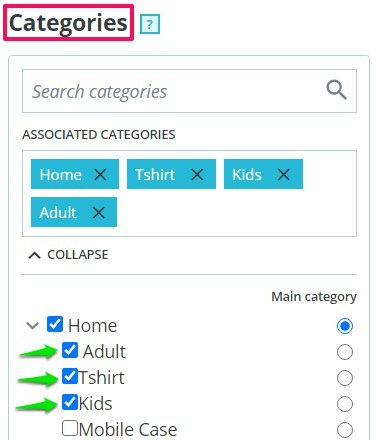
8. Scroll down to find Categories. Assign the product categories and click “Save.”
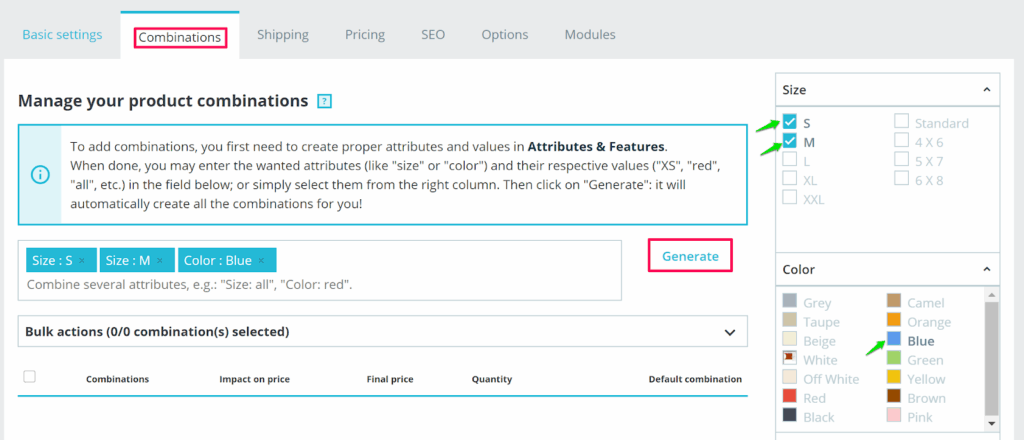
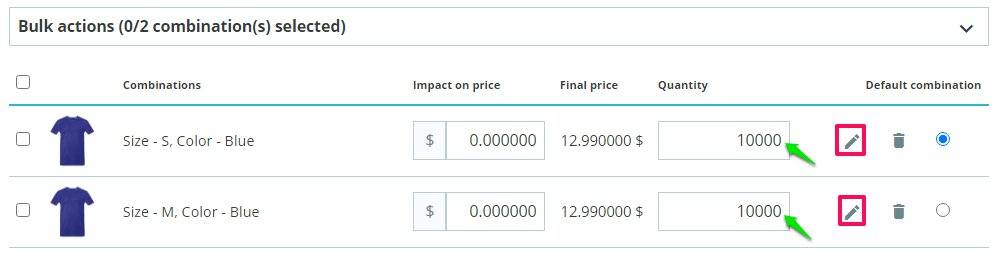
9. Click the Combinations tab. Move to the right, select your desired size and color, and tap “Generate”
10. The variations will be created for the product. Set the quantity for each variation and click the “Edit” icon to assign the product images to the respective variants.
11. A new page will appear. Scroll down to find Images, click on the images you want to assign, and click “Save.”
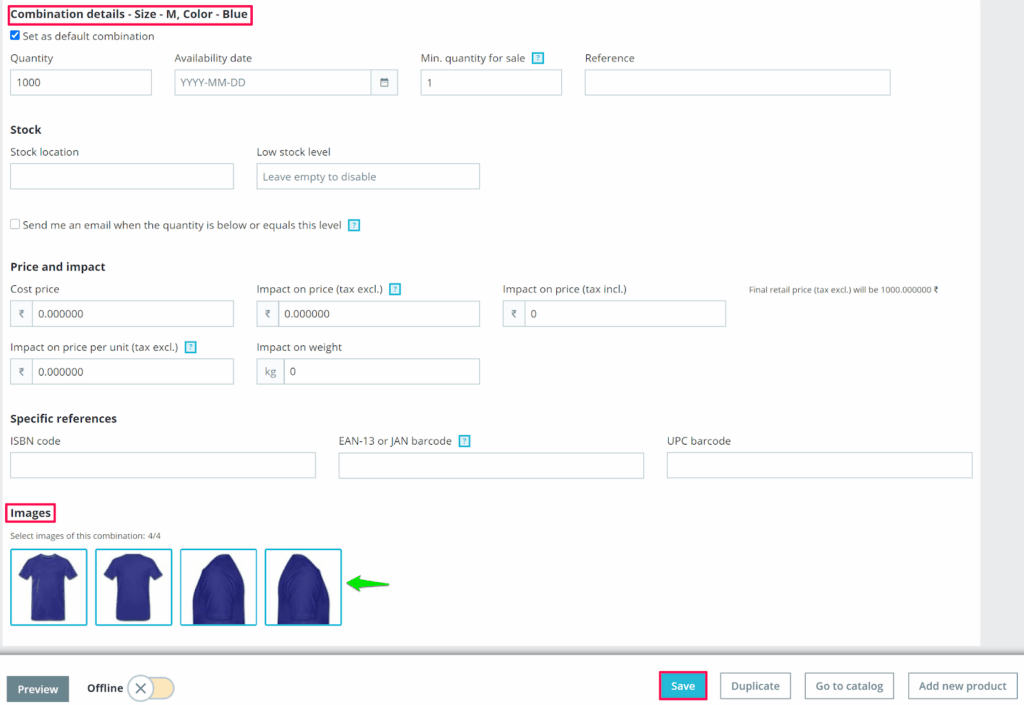
► Assign product images to each of the variations to display the product properly in the designer tool.
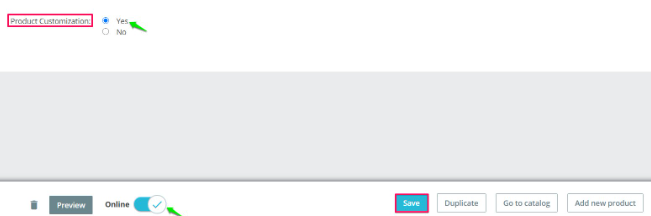
12. Select the Modules tab and click “Configure”, located under the Impact Designer Tool.

13. From Product Customization, select “Yes”
14. Toggle the Offline button to make it Online and click “Save.”
You have successfully added a product in PrestaShop Admin with product images!