
Steps to Add Product in Magento 2.X
1. Log in to your Magento Admin.
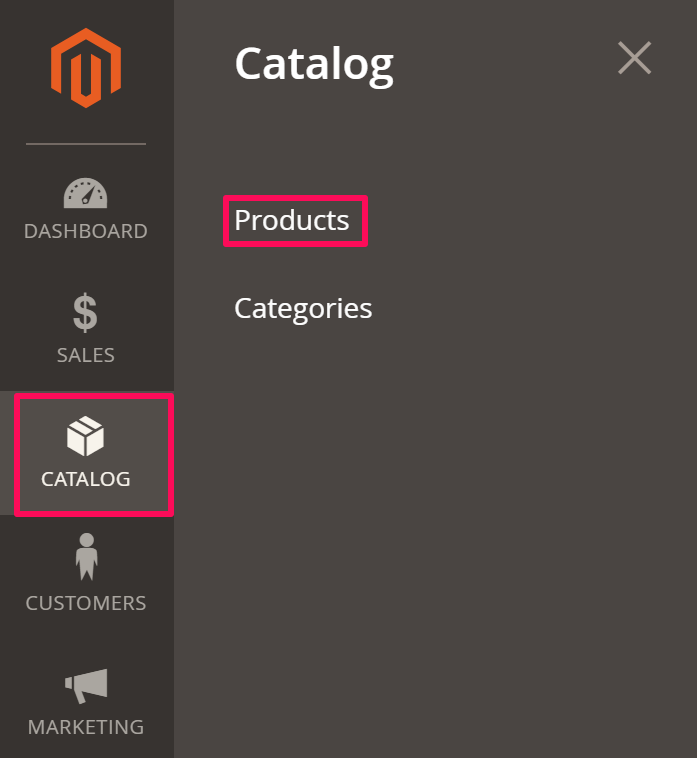
2. From the left toolbar, select Catalog, then from the navigation panel select Products.
3. Move to the right and click “Add Product.”

4. A new page will appear. Take the following actions there:
- Click the dropdown of Attribute Set and select Impact Designer. Enter the product name and price.

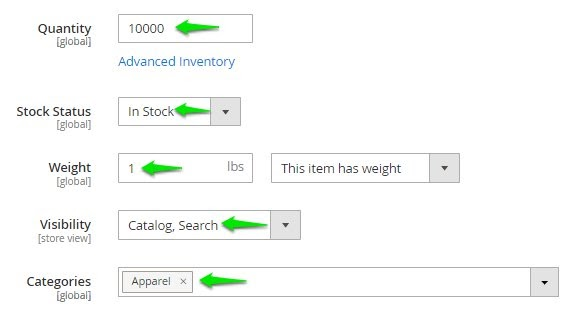
- Scroll down and enter the quantity of the product. From the dropdown of Stock Status, select In Stock.
- Enter the weight of the product, and from the dropdown of Visibility select Catalog, Search.
- From the dropdown of Categories, select the category of product.
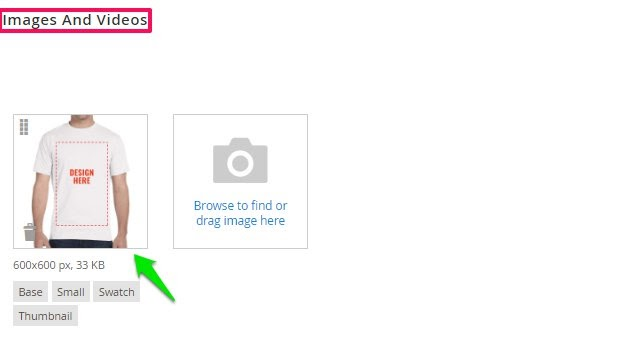
5. Scroll down to find Images and Videos. Click the upload icon to upload product images.
6. In the Configurations section, move to the right and click “Create Configurations.”

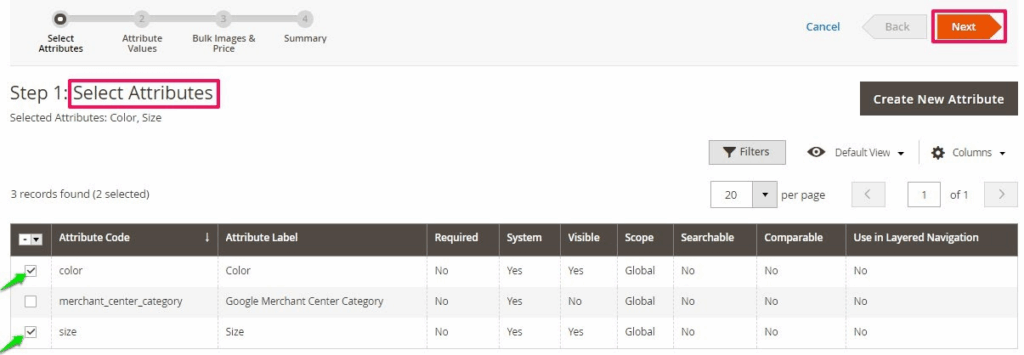
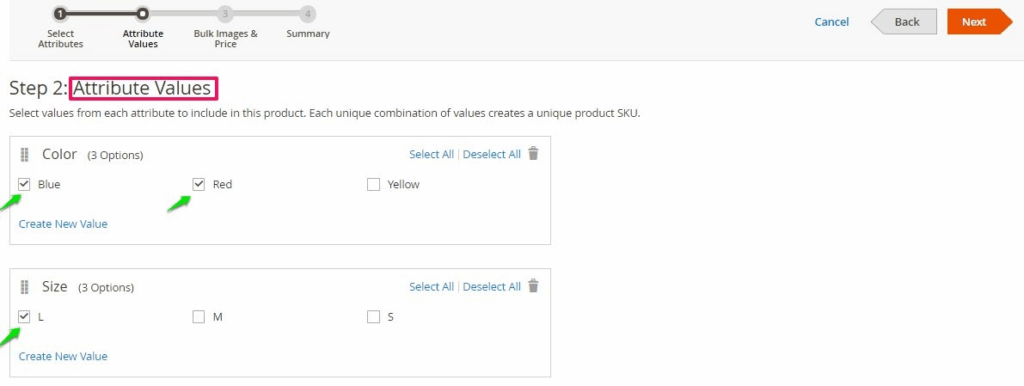
7. A new page appears. Under Select Attributes, select the color and size option of the product. Click “Next.”
8. In Attribute Values, assign the color and size of the product and click “Next.”
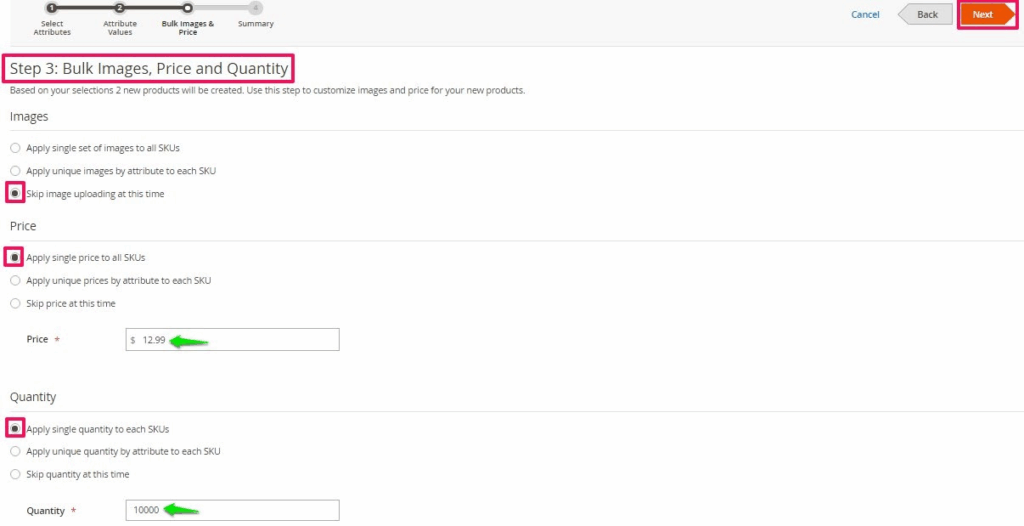
9. In this step, take the following actions:
(i) In the Images section, select the radio button Skip image uploading at this time.
(ii) Then, in the Price section, select the radio button of Apply single price to all SKUs and enter the price.
(iii) For Quantity, select the radio button of Apply single quantity to each SKU and enter the quantity.
(iv) Click Next.
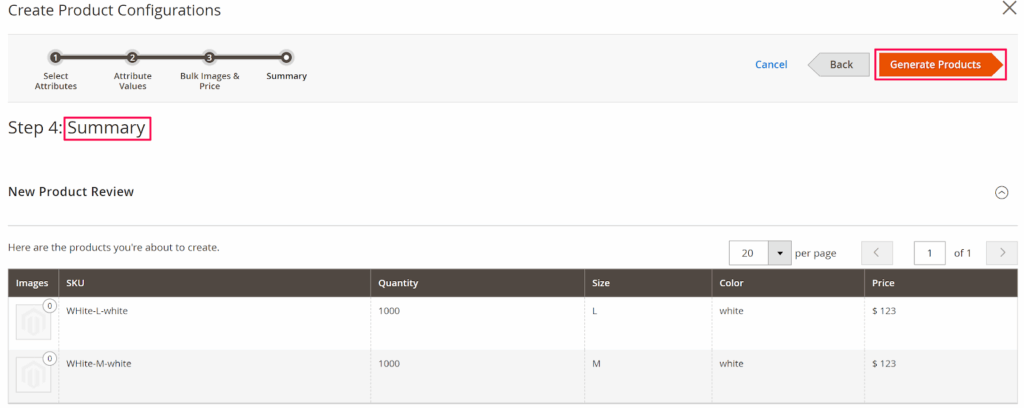
10. In the Summary page, all the variations will be created. Click “Generate Products.”
11. Click “Save”, which is at the top of the page.
12. Scroll down to find Show in Designer and set it to Yes.
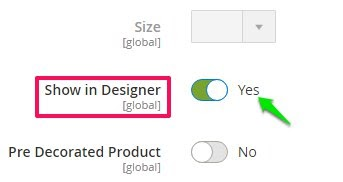
► “Show in Designer” makes the product customizable.
13. Click “Save.”
Your product has been added successfully!
Since you don’t have images for different color variants of the product, you have to upload the product image in Impact Designer Admin. To do that, follow the steps below:
► To create a transparent image for the product, click here.
1. Open Impact Designer Admin.
2. Click “Products” on the navigation panel.

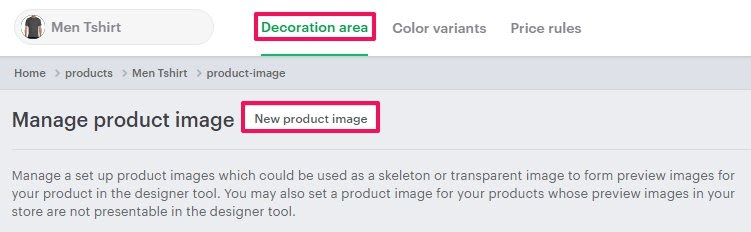
3. A Products page appears. Click “Settings”, which is below the Actions panel.

4. The decoration area setting page will appear. In Imprint Image, from the section Define my own views select “Manage.”

5. Under the Decoration Area tab, click “New Product Image.”
6. A pop-up box will open below. Enter the Product image name, upload the image of product, and set the side name of the product. You can upload multiple sides of a product by clicking Add Another.
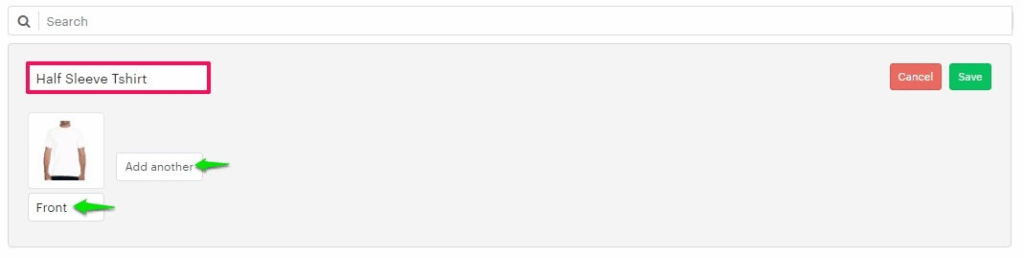
► The supported formats of a product image are PNG, JPG, and JPEG.
7. Click “Save.”
► After adding the imprint image, assign the product image to the product.
You have successfully added an imprint image of the product!