
Overview
An Amazon S3 bucket acts as a container that stores objects. An object is a file and any metadata that describes that file. To save a file in S3, you first create a bucket and then upload the object into it. Once stored, the object can be opened, downloaded, or moved as needed. If you no longer require a bucket or its contents, you can remove them to free up resources.
Prerequisite: Setting up Amazon S3
Before you begin, ensure that the following prerequisites are met:
- Set up an Amazon Web Console account.
- Create an IAM user with the necessary permissions. While a root account can also be used, it’s recommended to have the highest permissions and avoid using it in a production environment.
- Create your first S3 bucket.
Sign up for AWS
- Go to https://portal.aws.amazon.com/billing/signup#/start.
- Follow the on-screen instructions.
‣ Part of the process includes a phone verification step. - AWS will send a confirmation email once your account is ready.
- You can manage your account at https://aws.amazon.com/ by selecting “My Account”.
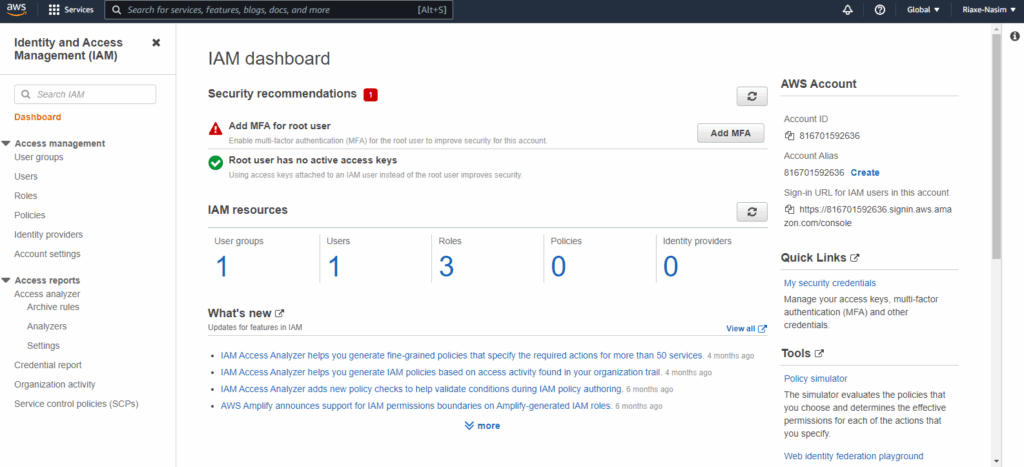
Create an IAM User
- Log in to the AWS Management Console.
- From the home dashboard, choose Identity & Access Management. (IAM): https://console.aws.amazon.com/iamv2/home#/users
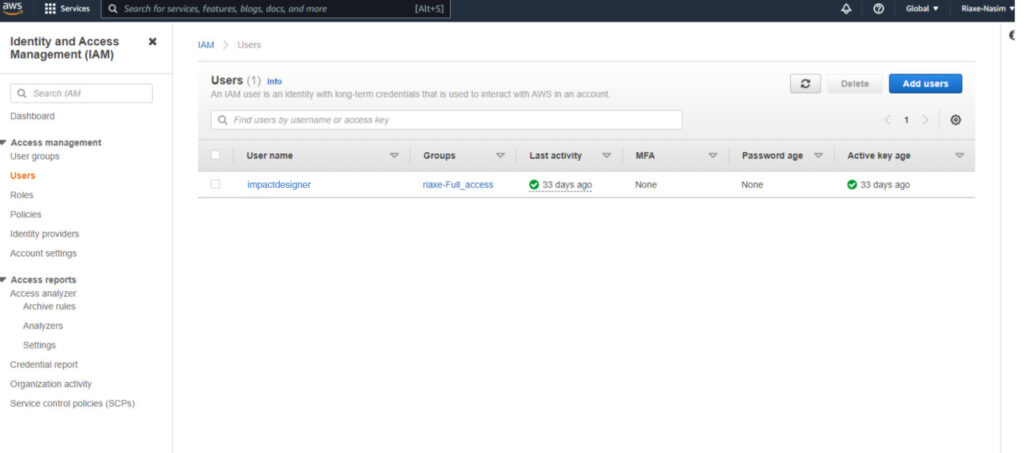
3. In the navigation panel, choose Users → Add user.
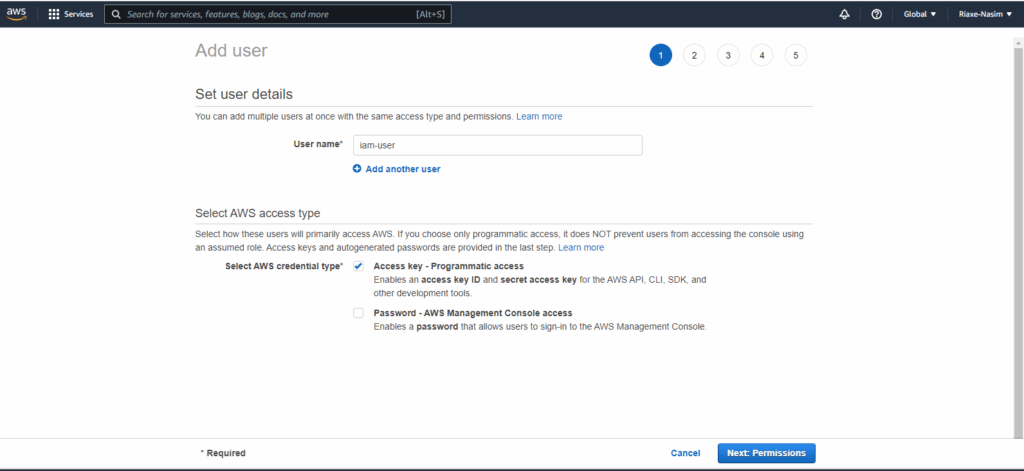
4. For the User name, enter “your_s3-admin_username” and check Access key – Programmatic access in the check box below.
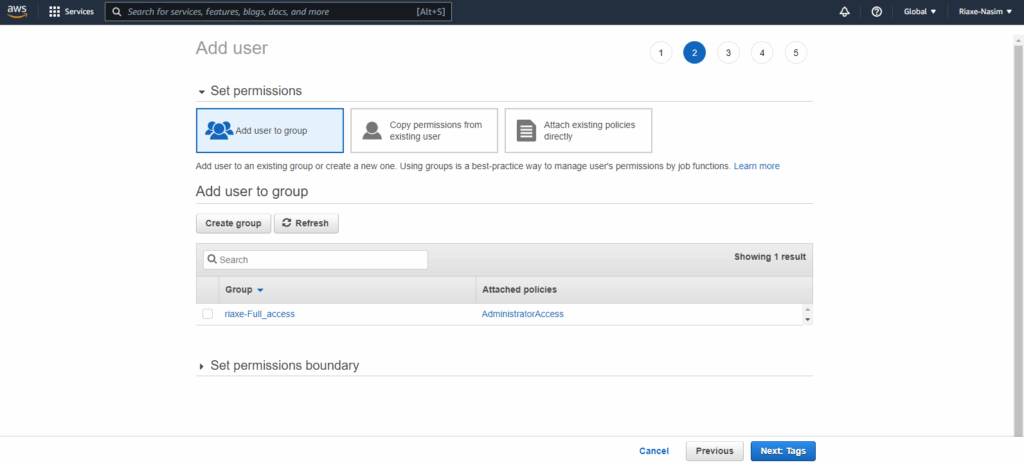
5. Create a group for the user and assign the policy to it.
6. Choose Next: Permissions.
7. Under Set permissions, choose to Add user to group.
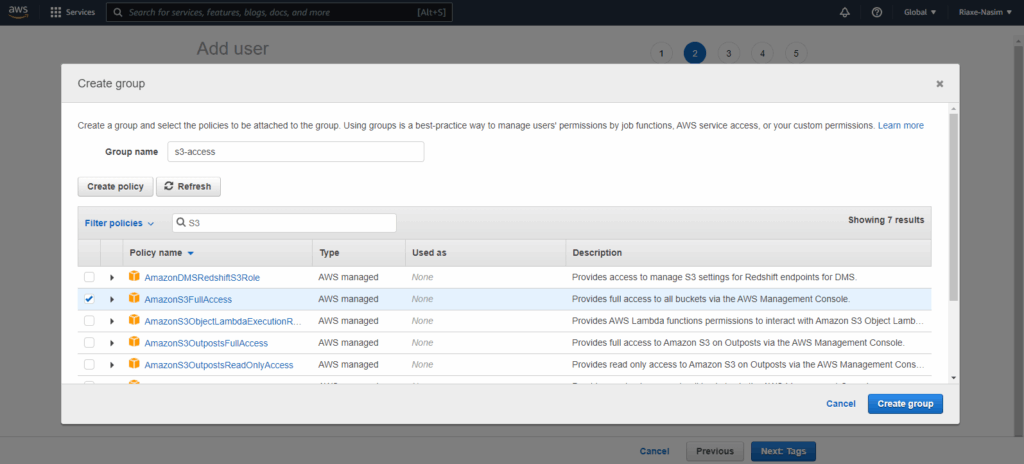
8. Choose Create group.
9. In the Create group dialog box, for Group name, enter your group name for that user. Example: “s3-admin-group”.
10. Choose Filter policies, and then type S3 to filter the table contents.
11. In the policy list, select the check box for AWS S3 Full Access. Then choose Create group.
12. Choose Next: Tags.
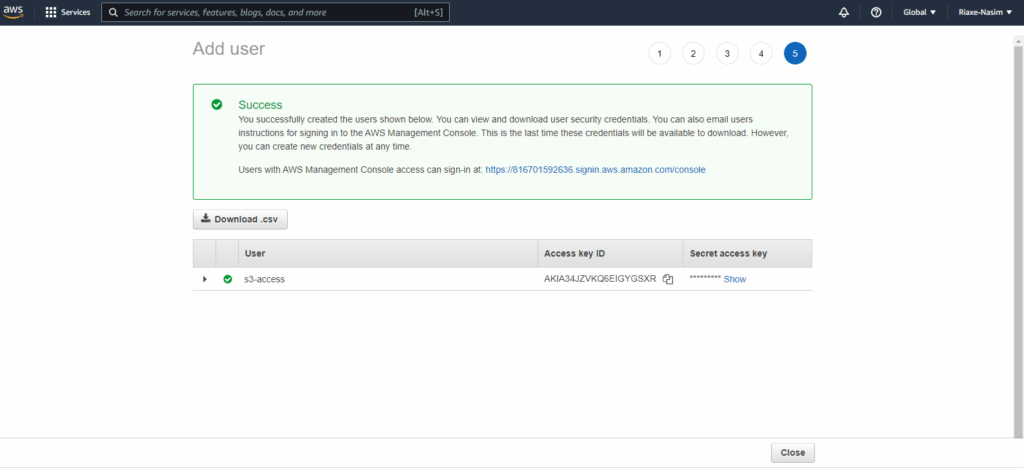
13. Choose Next: Review to see the list of group memberships to be added to the new user. When you are ready to proceed, choose to Create user.

14. After the user is created, the next important step is to download the CSV file containing the Access key and Secret key for programmatically accessing the S3 Bucket.
Create Your First S3 Bucket
- Sign in to the AWS Management Console and open the Amazon S3 console at https://console.aws.amazon.com/s3/.
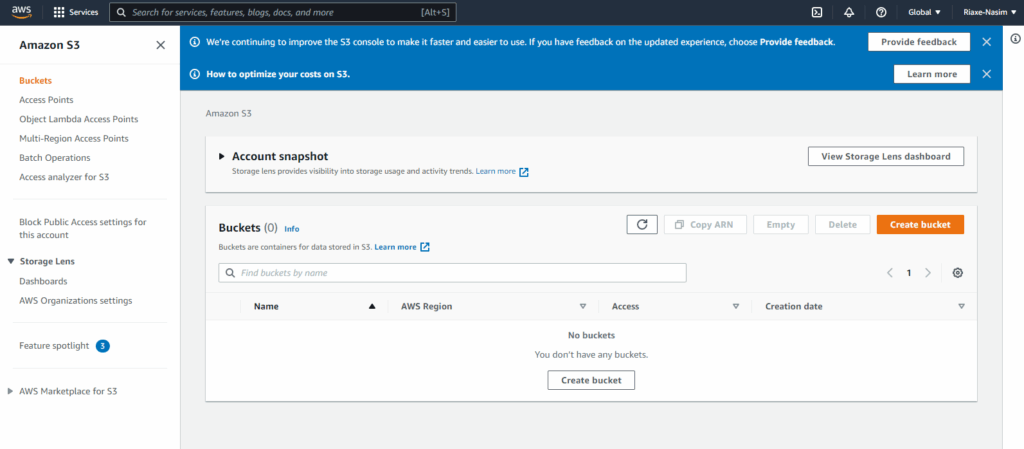
2. Choose “Create bucket”. The Create bucket wizard opens.
3. In “Bucket name”, enter a DNS-compliant name for your bucket.
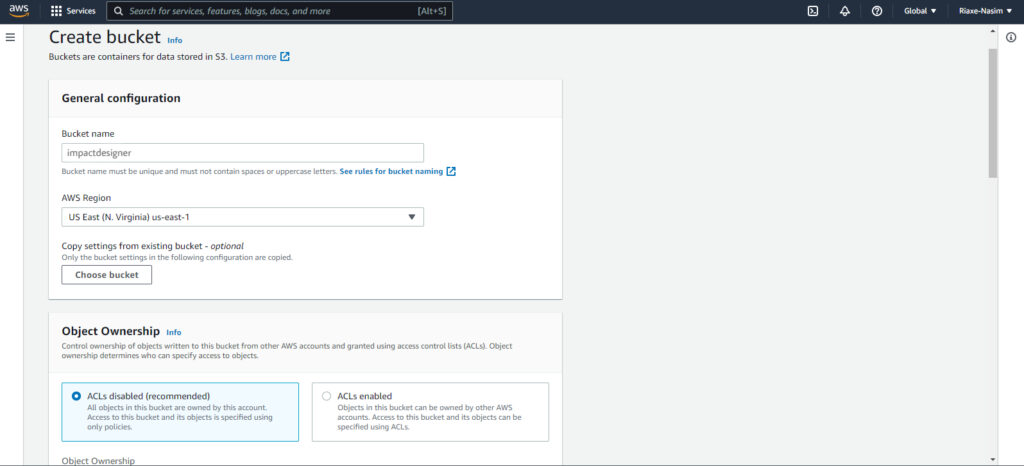
The bucket name must:
- Be unique across all of Amazon S3.
- Be between 3 and 63 characters long.
- Do not use uppercase characters.
- Start with a lowercase letter or number.
4. After you create the bucket, you cannot change its name. For information about naming buckets, see Bucket naming rules.
5. In Region, choose the AWS Region where you want the bucket to reside. Choose a Region close to you to minimize latency and costs and address regulatory requirements. Objects stored in a Region never leave that Region unless you explicitly transfer them to another Region.
6. Under Object Ownership, to disable or enable ACLs and control ownership of objects uploaded in your bucket, choose one of the following settings:
ACLs disabled (by default)
- Bucket owner enforced – ACLs are disabled, and the bucket owner automatically owns and has full control over every object in the bucket. ACLs no longer affect permissions to data in the S3 bucket. The bucket uses policies to define access control.
- To require that all new buckets are created with ACLs disabled by using IAM or AWS Organisations policies, see Disabling ACLs for all new buckets (bucket owner enforced).
7. ACLs enabled
- Bucket owner preferred – The bucket owner owns and has full control over new objects that other accounts write to the bucket with the bucket-owner-full-control canned ACL.
- If you apply the bucket owner preferred setting to require all Amazon S3 uploads to include the bucket-owner-full-control canned ACL, you can add a bucket policy that only allows object uploads that use this ACL.
- Object writer – The AWS account that uploads an object owns the object, has full control over it, and can grant other users access to it through ACLs.
8. In Bucket settings for Block Public Access, choose the Block Public Access settings that you want to apply to the bucket. We recommend that you keep all settings enabled unless you know that you need to turn off one or more of them for your use case, such as to host a public website. Block Public Access settings that you enable for the bucket are also enabled for all access points that you create on the bucket.
9. Click on “Create bucket,” and the bucket will be created.
10. Set up CORS.
‣ CORS stands for Cross-Origin Resource Sharing. As the name says, it allows you to request a cross-origin resource. In simple terms, it allows you to request a resource, such as an image or CSS, from another domain.
How to enable CORS on your Amazon S3 buckets?
To enable CORS on your Amazon S3 bucket, follow the steps below:
- Select your desired S3 bucket.
- In the right-hand panel, click Permissions.
- Click Edit CORS Configuration.
- In the pop-up dialog, paste the following text:
[{“AllowedHeaders”: [“*”],”AllowedMethods”: [“GET”,”HEAD”],”AllowedOrigins”: [“*”],”ExposeHeaders”: []} ] - Click Save.