
Once Impact Designer is successfully installed on your custom platform, you’ll be able to access the admin panel and tools with the dummy data included in the package for testing purposes.
To integrate your custom store with Impact Designer, you’ll need to modify or add a few codes inside the Impact Designer installation directory. This allows store data, such as products, to be fetched from your custom store.
Impact Designer APIs are built in PHP using the Slim framework. The primary store modules used include stores, products, customers, carts, and orders. For detailed guidance, please refer to our API documentation.
Let’s begin the integration with the Product module as an example.
Our first step will be to fetch the product list from the custom store.
Step 1: Test the API Endpoint
- Get the endpoint details from the API Documentation.

- You need to run the endpoint using Postman like https://abc.com/designer/api/v1/products?name=tshirt&category=34&orderby=name&order=asc&page=1&per_page=40&is_admin=1&store_id=1, where the ‘abc.com’ is your domain and ‘designer’ is the Impact Designer installation directory.
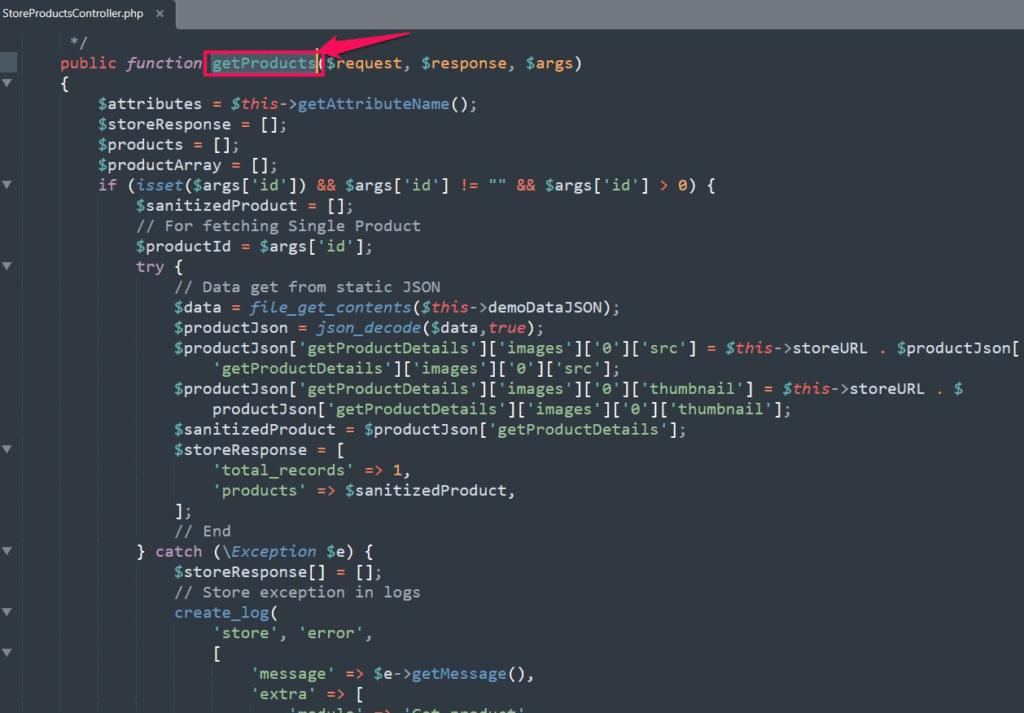
Step 2: Locate the Product Controller
- Go to the following file path on your server:
document_root/designer/api/v1/app/Modules/Products/Stores/Others/v2x/Controllers/StoreProductsController.php - Open the file and search for the function name “getProducts”.
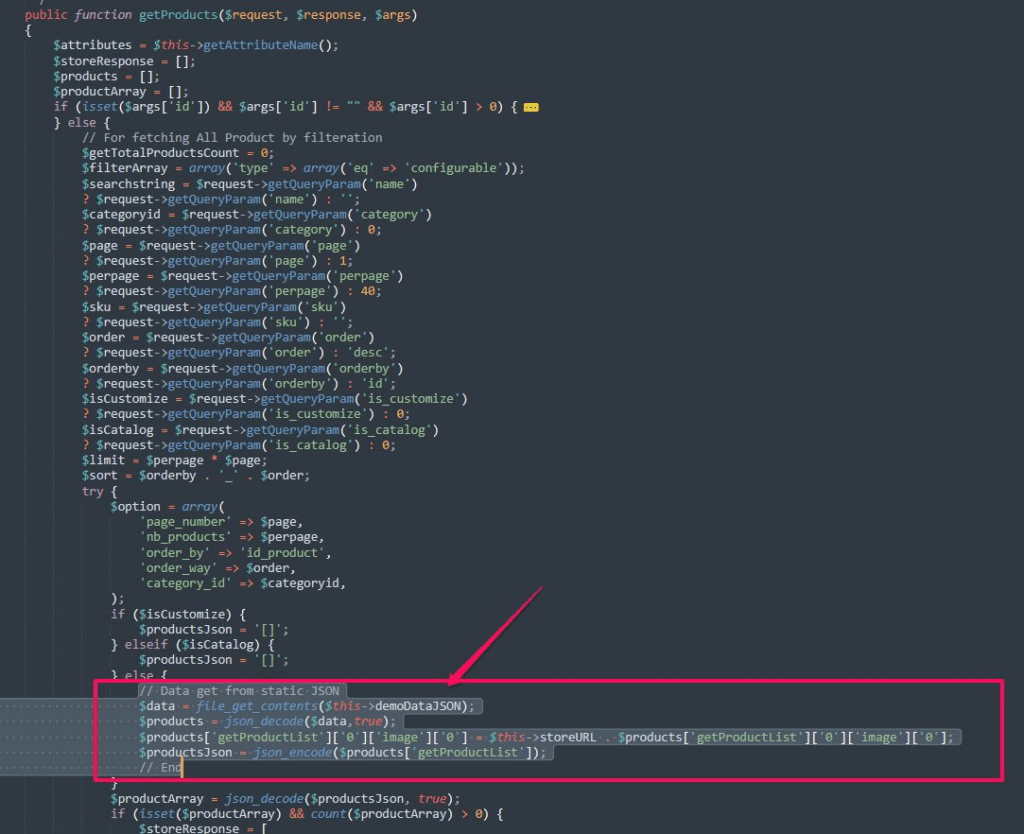
Step 3: Replace Dummy Data with Store Logic
- Find the code line where the product list data is fetched from dummy JSON.
- Replace this logic with your custom store code that fetches the product list from your store’s database or API.
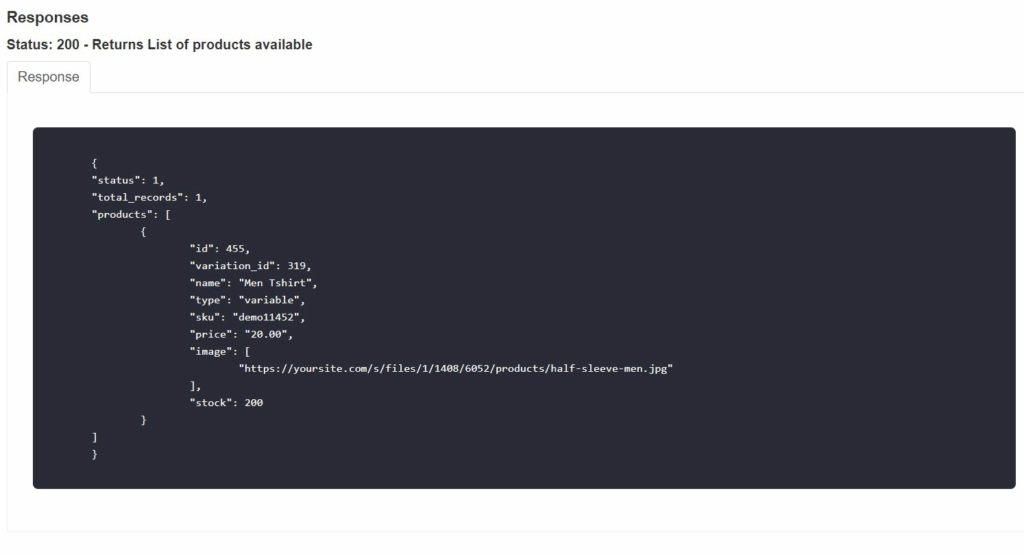
Step 4: Return Data in the Correct Format
- Make sure your code returns data in the same structure as defined in the API Documentation.
- This ensures Impact Designer can process the product data correctly for use in the Designer Tool and Admin Panel.
Once complete, Impact Designer will start displaying products from your custom store instead of the dummy test data.