
Steps to Configure Email Settings
1. Open Impact Designer Admin.
2. Click “Global Settings” in the navigation panel.

3. The General attributes page will appear.
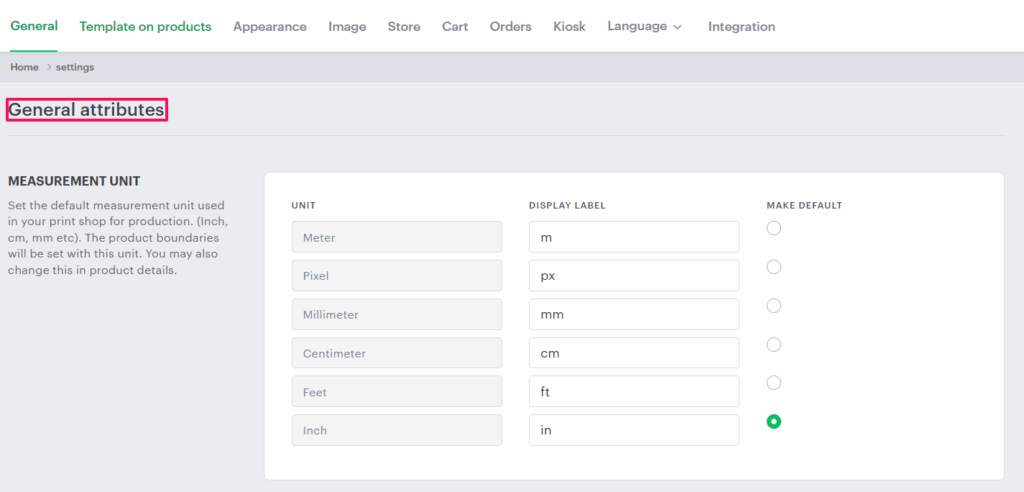
4. Scroll down to find Email settings and toggle the button to Enable email settings.

5. Enter the details in the Email settings and SMTP settings. Click the “Verify SMTP” button to verify whether the details are correct or not. You will receive an email if the settings are correct.
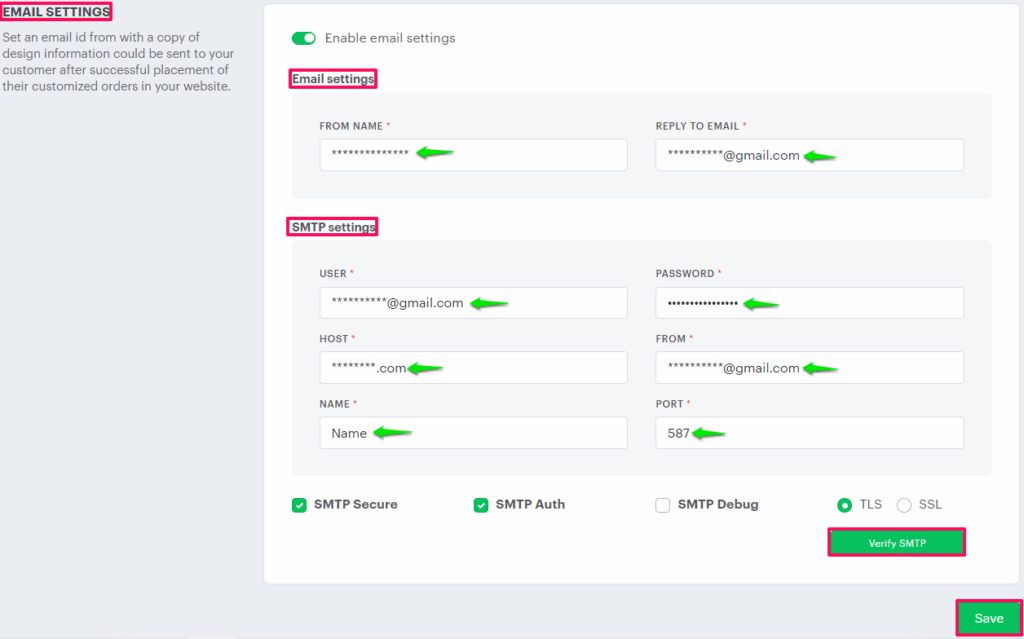
FROM NAME: Refers to the name that appears in the “From” field of the emails you send.
REPLY TO EMAIL: Here, set the email address where replies will go when someone responds to an email you sent them.
USER: Contains a username to authenticate on the main SMTP server.
PASSWORD: It contains a password to authenticate on the main SMTP server.
HOST: Here, provide the domain name or IP of the main SMTP server.
FROM: Set an email address that appears as the sender when someone receives an email sent from your server or application.
NAME: Set the name associated with the sender’s email address.
PORT: It is a network port number used for communication between your email client or server and the SMTP.
SMTP Secure: It specifies the encryption method used for secure email transmission between your server and the mail server.
SMTP Auth: It authenticates the mechanism used to verify the identity of the sender when sending emails through SMTP.
SMTP Debug: It enables detailed logging and troubleshooting information for SMTP email-sending processes.
TLS: It is a protocol that encrypts email communication to enhance security during transmission.
SSL: It is a protocol that encrypts email communication for secure transmission between clients and servers.
6. Click “Save.”
You have successfully configured the email settings!