
Steps to Add Attributes to a Product in WooCommerce Admin
► Before assigning attributes to the product, you need to set the product information, like product name, description, price, etc.
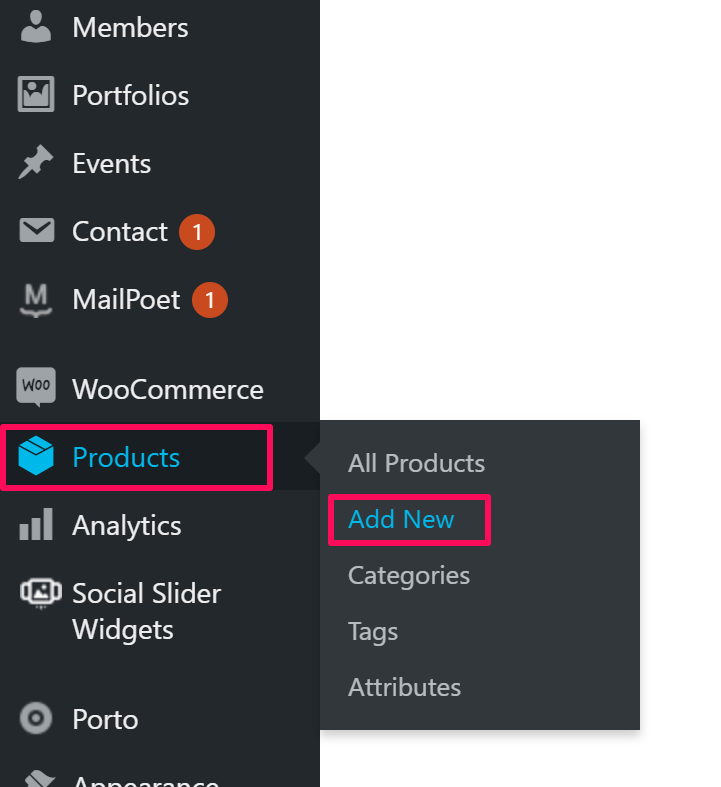
1. Log in to your WooCommerce Admin.
2. From the left toolbar, hover over Products and click “Add New”
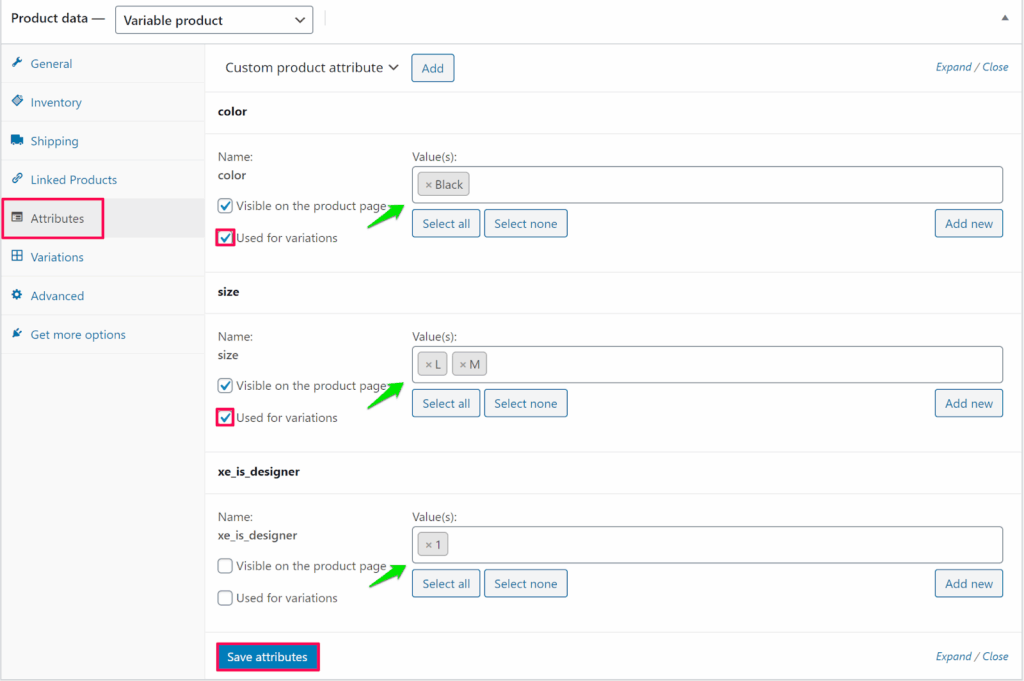
3. Scroll down to find the Product Options. Under Product Data, select the Attributes tab and take the following actions:
- Select Color from the dropdown and click “Add”. A box will appear. Enter the color of the product and check Used for variations.
- Select Size from the dropdown and click “Add”. A box will appear. Enter the size of the product and check Used for variations.
- Select xe_is_designer from the dropdown and click “Add”. A box will appear. Enter 1 and uncheck the two checkboxes that appear below.
- Tap “Save Attributes.”
► To enable the Customize button for the product, you need to assign the attribute xe_is_designer.
You have successfully added attributes to the product in WooCommerce Admin!