
Steps to Add CMYK Color
1. Open Impact Designer Admin.
2. Click “Assets” on the navigation panel.

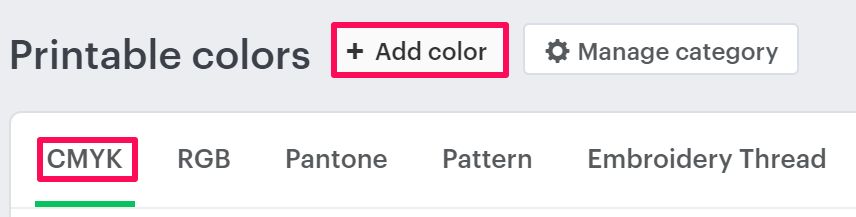
3. Click “Printable colors.”

4. On the Printable Colors page, select the tab CMYK and click “Add color.”
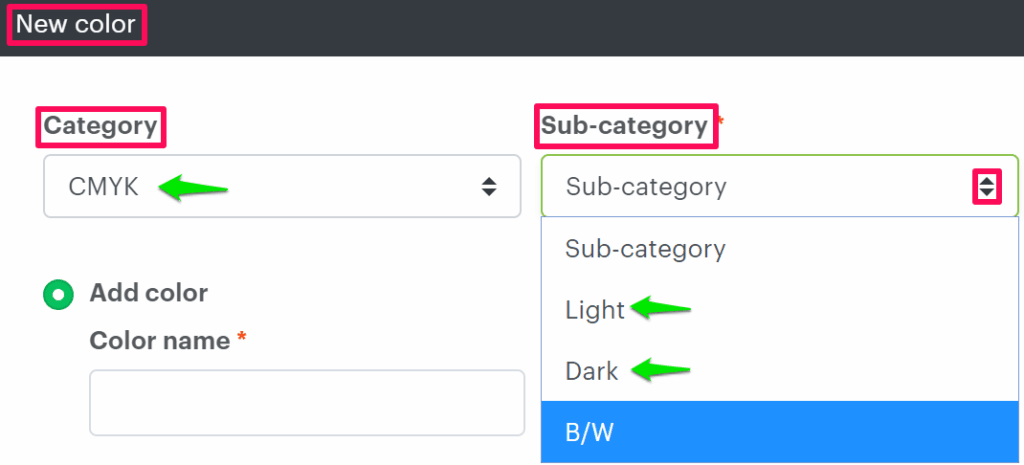
5. A pop-up named New color will open. Select CMYK from the dropdown of Category. Then click the dropdown of “Sub-category” and select your desired subcategory.
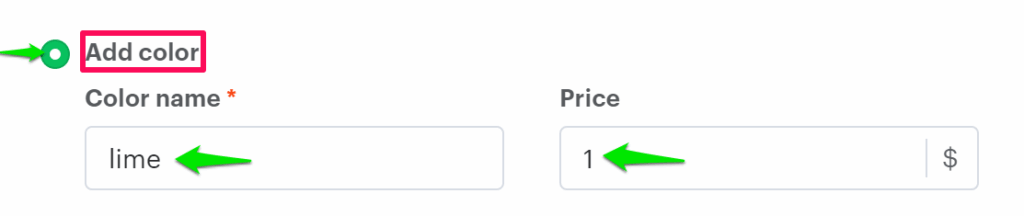
6. Select the radio button of “Add color” and set the properties such as color name and price.
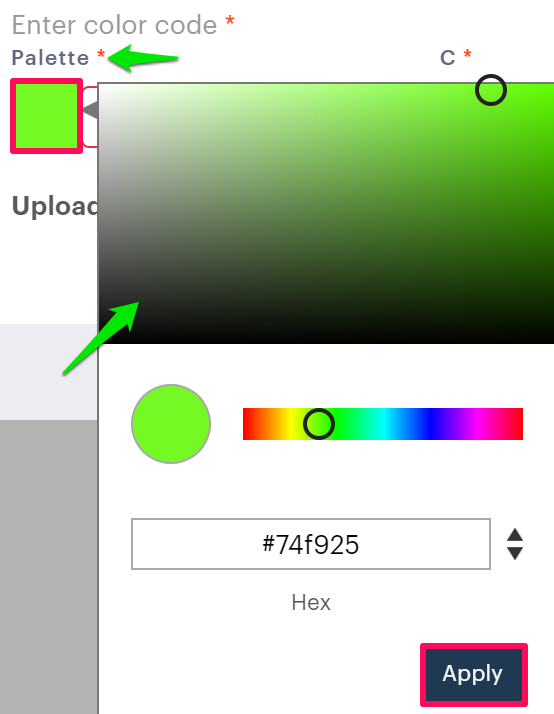
7. Click the square box which is under the palette and select a color from the color picker. “Click Apply.”
8. Click “Save.”
You have successfully added CMYK color!
► After adding CMYK color, you need to assign the sub-category of CMYK to the print profile.