
Steps to Assign Font Subcategories to the Print Profile
1. Open Impact Designer Admin.
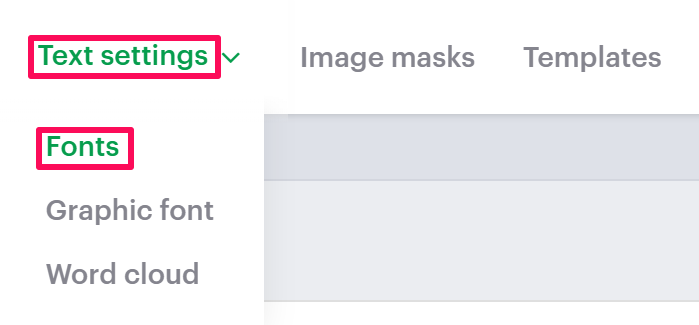
2. Click “Assets” in the navigation panel.

3. Click “Text Settings” and select “Fonts.”
4. On the Fonts page, select “Manage Category.”

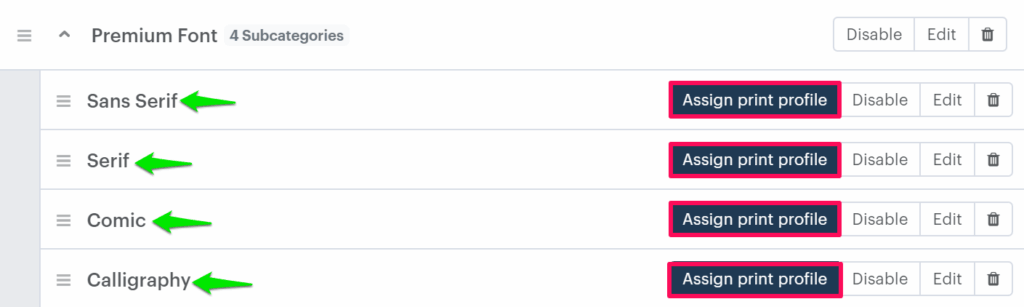
5. Under the Manage Category section, choose the categories that have subcategories and click the “Expand” option of that category.

6. All the subcategories will be listed. Choose your desired subcategory and click “Assign Print Profile.”
7. A pop-up named Assign Print Methods will open. Select the desired print profile you want to assign.
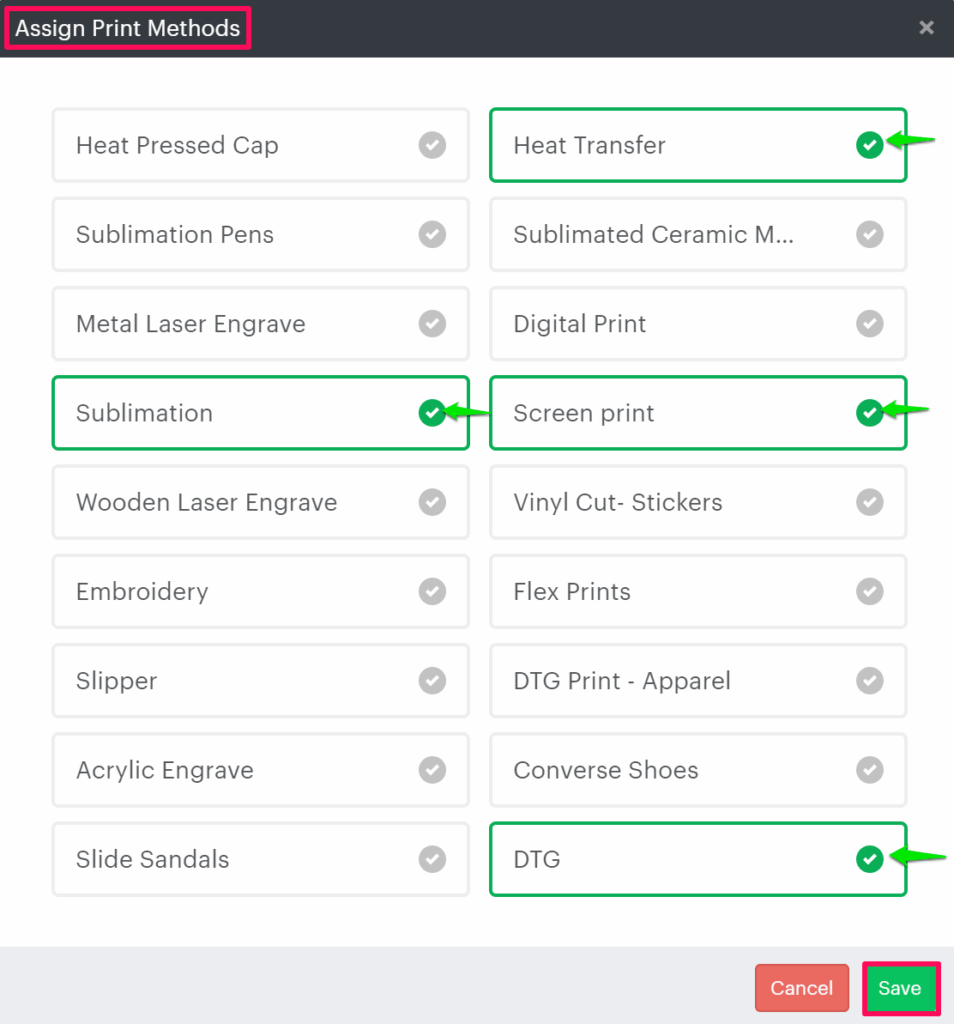
8. Click “Save.”
You have successfully assigned a font subcategory to the print profile!
► The subcategory should be added to the respective category before assigning it to the print profile.