
Steps to Create a Category of Clipart
1. Open Impact Designer Admin.
2. Click “Assets” in the navigation panel.

3. Click “Design Assets” and select “Clipart.”
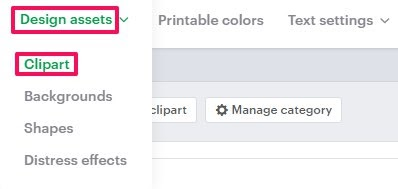
4. In the Clipart page, select Manage category.

5. Under Manage Category, select “Category.”

6. A box will open below. Enter the name of a category.
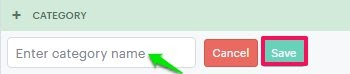
7. Click “Save.”
You have successfully added a new category for your clipart!
► After creating the category, you need to assign it to the print profile.